
So anyway…..I have a ton of clear vases that are just hanging out in my garage collecting dust and pollen. My wheels were spinnin’ about what I could do with these vases. So, to Google I went!
I Googled “DIY Mercury Glass” and found a great article on Martha Stewart about making your own mercury glass. I don’t know about you guys, but all of her tutorials seem so vague to me!! I need some serious step-by-step instructions, people!!! But, I could actually handle this tutorial. It was pretty straight forward.

{via}
All I really needed was the Krylon Looking Glass spray paint.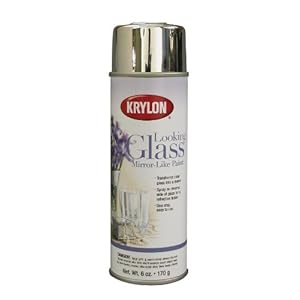
Three ridiculous days & 5 home improvement and craft stores later, I still could not find the Krylon Looking Glass spray paint!! No one in my town carries it! I could have ordered it off of Amazon by now and it would have been here in 2 days! UGH! So, I checked one last place that I always forget about…..Ace Hardware. No luck there either. But, I did find an alternative (or so I hoped). It is Krylon’s Chrome Aluminum spray paint. It still had that “mirrored” finish that I was looking for. So I bought it & thought I’d give it a whirl. And IT WORKED!!! Woo-hoo!
So here’s how you do it:
You will need:
- a squirt bottle filled with water
- a clear vase or votive holder or candlestick or whatever else you want to make into mercury glass
- Krylon’s Looking Glass spray paint OR Krylon’s Chrome Aluminum spray paint

First, you need to make sure your vase is clean so give it a good rinse and wipe down first.
Then, you are going to mist the inside of the vase with the squirt bottle. You don’t want to douse the inside and puddle it with water. You just want to mist all around the inside.

It should look something like this when you’re done misting:

See all the little beads of water? That’s what you want! That’s what is going to give it the “aged” or “antiqued” look you’re going for.
Next, you want to lightly spray the inside of the vase with the Looking Glass or Chrome Aluminum spray paint (use the rules of spray painting with this project too! Light, even coats does the trick).

You really only need to do one or two coats (depending on how dark you want it to be).
Turn the vase upside down on a ventilated surface (a cooling rack will be just fine). I have a basket that has a “mesh” top and so I just sat it on that.
 Let the vase dry overnight.
When it’s all dry, it will look something like this:


This is a different vase that I did a couple of weeks ago. It looks A LOT better in person! The pictures just don’t do it justice!
This is a simple project that took me all of about 10 minutes!
If you try it, let me know how it turns out!
Amy


Oh, super cute! I've never heard of these. Thanks for sharing.
ReplyDeleteLove this idea! you're so crafty and your blog is stinkin' cute!
ReplyDeleteWhat a great idea! And your step-by-step (ppersonal details) tutorial is great! yvette@twistedvines
ReplyDeleteHmmmm, perhaps this is the answer to softening the clear glass light fixtures in my house! Great idea and lovely final product!
ReplyDeleteHiya, I'm a new follower. Just found your blog today. Can't wait to read more.
ReplyDeleteWhat a great DIY
shellseaoberski.blogspot.com
love it. you did a great job. I've found looking glass in Hobby Lobby, if you have one near you, you may want to check there for the future.
ReplyDeleteLove it! Now I really want to try it myself!
ReplyDeleteI really like this idea and plan on doing one myself! Off tot he thrift store to find a vase...
ReplyDeletethis is an AMAZING idea. I really am going to try it. THANK YOU!!!
ReplyDeletekathryn
www.thedragonsfairytail.blogspot.com
What a great idea - I will have to try it.
ReplyDeleteFound you on the Sunday Showcase.
AAAHHHH! I have the chrome aluminum paint!!! This so great -- I LOVE Mercury glass! And I know I have lots of old, glass vases - who doesn't! Trying this for sure! Thanks!
ReplyDeleteThat is such an amazing idea! I also have lots of old glass vases - can't wait to pull some out and try this!
ReplyDeleteThat looks great! Who would have thought it would be so simple to create your own mercury glass!
ReplyDeleteI would love if you came over and linked this project to my weekly Round Tuit party at:
http://jembellish.blogspot.com/
Have a great week!
Jill @ Creating my way to Success
That looks great! Who would have thought it would be so simple to create your own mercury glass!
ReplyDeleteI would love if you came over and linked this project to my weekly Round Tuit party at:
http://jembellish.blogspot.com/
Have a great week!
Jill @ Creating my way to Success
Great tute! I love mercury glass too! I have been wanting to try something like this, but haven't gotten around to it. Do you have a hobby lobby near by? They carry the looking glass spray paint. It's sort of pricy...about twelve dollars, but you could probably use a 40% off coupon. I would love for you to come link up to my Sew Crafty Party !
ReplyDeleteThat looks great!! Thanks for auditioning for OMTWI!!
ReplyDeleteI just found your blog and have been looking through your posts! I just love this! Such a great idea and easy!
ReplyDeletePS- I SO know what you mean about stuff not photographing well! :( At least you can enjoy its beauty!
ReplyDeleteHi, Just want to let you know I highlighted your tutorial on my wedding blog today. www.theweddinggals.net Thanx for the great info.
ReplyDeletephyllis
Wow Amy! That looks great. And so glad you can use something other than looking glass spray because I can't find it either ;-(.
ReplyDeleteIf you do a votive can you actually light a candle in it? Is it flammable??
ReplyDeleteKonya
ReplyDeleteKayseri
Malatya
Elazığ
Tokat
1VH
Eskişehir
ReplyDeleteAdana
Sivas
Kayseri
Samsun
T1K1U
Denizli
ReplyDeleteKonya
Denizli
ısparta
Bayburt
52WFUS
Eskişehir
ReplyDeleteAdana
Sivas
Kayseri
Samsun
WBL5LK
bitlis
ReplyDeleteurfa
mardin
tokat
çorum
DFDD7
7C34E
ReplyDeleteTekirdağ Parça Eşya Taşıma
Çankırı Parça Eşya Taşıma
Balıkesir Evden Eve Nakliyat
Niğde Evden Eve Nakliyat
Aydın Parça Eşya Taşıma
E3B53
ReplyDeleteAfyon Şehirler Arası Nakliyat
Artvin Lojistik
Kastamonu Lojistik
Balıkesir Parça Eşya Taşıma
Denizli Evden Eve Nakliyat
Mardin Lojistik
Btcturk Güvenilir mi
Batman Evden Eve Nakliyat
Bingöl Lojistik
65226
ReplyDeleteEtimesgut Boya Ustası
Çerkezköy Cam Balkon
Tunceli Lojistik
Kastamonu Evden Eve Nakliyat
Niğde Şehir İçi Nakliyat
Bartın Parça Eşya Taşıma
Osmaniye Evden Eve Nakliyat
Çankırı Lojistik
Sinop Şehir İçi Nakliyat
A34D7
ReplyDeleteErgo Coin Hangi Borsada
Adana Şehirler Arası Nakliyat
Amasya Lojistik
Malatya Evden Eve Nakliyat
Sivas Parça Eşya Taşıma
Osmaniye Şehir İçi Nakliyat
Konya Parça Eşya Taşıma
Tekirdağ Boya Ustası
Ünye Evden Eve Nakliyat
D9304
ReplyDeleteEryaman Alkollü Mekanlar
Erzurum Evden Eve Nakliyat
Kars Evden Eve Nakliyat
Osmaniye Evden Eve Nakliyat
Silivri Parke Ustası
deca durabolin
Mersin Evden Eve Nakliyat
Ardahan Evden Eve Nakliyat
winstrol stanozolol for sale
3BA63
ReplyDeletemardin kadınlarla rastgele sohbet
tamamen ücretsiz sohbet siteleri
agri en iyi ücretsiz sohbet uygulamaları
tunceli rastgele sohbet odaları
rastgele sohbet
canli sohbet chat
kırşehir canlı sohbet odası
eskişehir sohbet uygulamaları
ücretsiz sohbet odaları
FE8D6
ReplyDeleteaydın rastgele görüntülü sohbet uygulamaları
manisa sesli sohbet odası
kars tamamen ücretsiz sohbet siteleri
Kocaeli Telefonda Kadınlarla Sohbet
Balıkesir Canli Goruntulu Sohbet Siteleri
bingöl sesli sohbet odası
yozgat görüntülü sohbet uygulamaları ücretsiz
mardin en iyi ücretsiz sohbet siteleri
eskişehir en iyi ücretsiz görüntülü sohbet siteleri
32DAD
ReplyDeleteBig Wolf Coin Hangi Borsada
Görüntülü Sohbet Parasız
Twitter Trend Topic Hilesi
Coin Madenciliği Siteleri
Jns Coin Hangi Borsada
Onlyfans Beğeni Satın Al
Soundcloud Reposts Hilesi
Instagram Beğeni Hilesi
Threads Beğeni Hilesi
A527F
ReplyDeleteKripto Para Madenciliği Nasıl Yapılır
Youtube Abone Hilesi
Hamster Coin Hangi Borsada
Ergo Coin Hangi Borsada
Satoshi Coin Hangi Borsada
Soundcloud Beğeni Hilesi
Binance Madencilik Nasıl Yapılır
Coin Kazma Siteleri
Youtube İzlenme Satın Al
48764
ReplyDeleteKaspa Coin Hangi Borsada
Binance Hesap Açma
Threads Yeniden Paylaş Satın Al
Binance Hesap Açma
Osmo Coin Hangi Borsada
Coin Para Kazanma
Dlive Takipçi Satın Al
Ceek Coin Hangi Borsada
Binance Ne Kadar Komisyon Alıyor
D433E
ReplyDeleteBitcoin Nasıl Oynanır
Coin Nasıl Alınır
Kripto Para Çıkarma
Kripto Para Kazma
Bitcoin Para Kazanma
Tiktok İzlenme Hilesi
Görüntülü Sohbet Parasız
Binance Hesap Açma
Pinterest Takipçi Satın Al
DD784
ReplyDeleteInstagram Beğeni Hilesi
Binance Referans Kodu
Twitter Takipçi Satın Al
Telegram Abone Satın Al
Threads İzlenme Satın Al
Keep Coin Hangi Borsada
Jns Coin Hangi Borsada
Aion Coin Hangi Borsada
Binance Referans Kodu
10F8F
ReplyDeletedexview
satoshivm
poocoin
avalaunch
spookyswap
dexscreener
dappradar
pancakeswap
shapeshift
564E386676
ReplyDeletetiktok ucuz takipçi
96ECC07369
ReplyDeleteucuz takipçi
440B09C3A7
ReplyDeleteinstagram takipci fiyat
D6F1D06846
ReplyDeletetürk kadın takipçi
tiktok beğeni satın al
gerçek takipçi
güvenilir takipçi
ucuz takipçi