
Ok, so our friend Lindsey inspired my friend Brittany & I to get the Cake Pop book from Bakerella. Yes, we each had to get our own!

{via}
We went over to Lindsey’s for an Orient Expressed trunk show and she had made these fabulous cake pops. They were delish! Cake pops are the new “in” thing, I guess. If you do a Google Image search for cake pops, you will find so much inspiration. I have been “pinning” some cake pops on Pinterest. I need to pin some more!
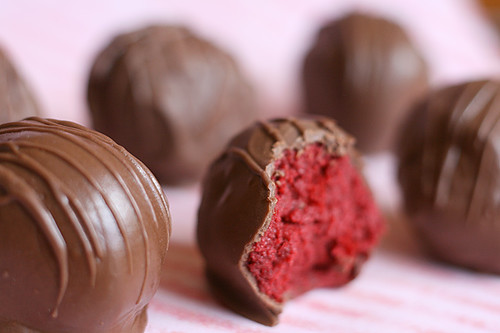
Anywho, Brittany and I started off small. Baby steps, people! We started with some red velvet cake balls. We didn’t even bother with the sticks, yet. Hah! Here’s how ya do it:
{via}
What you’ll need:
- 1 box cake mix (we used red velvet)
- 1 container of store bought frosting (we used cream cheese frosting)
- large mixing bowl
- 9x13 cake pan
- wax paper
- a couple baking sheets
- deep, microwave safe bowl
- small ziploc bag
- light cocoa/milk chocolate candy melts
- white candy melts
How to make:
- Bake your cake according to the directions on the box
- Allow cake to cool completely after it is finished baking
- When cake is cooled, crumble the entire cake finely into a bowl (you might want to run a fork through the cake after you’ve crumbled it just to make sure it’s extra crumble-y) :-)
- Add about 3/4 of the container of store bought cream cheese frosting to the crumbled cake (this is where it gets messy)
- With your hands, work the frosting into the cake thoroughly. The mixture should be moist enough to roll into balls & hold the round shape.
- Once the frosting is worked in well, proceed to roll the mixture into small balls (about 1.5” balls) and place them on a cookie sheet that is covered with wax paper
- Place the cookie sheet in your freezer. You’ll need to freeze the balls for a little while so they can become firm. They will become firm after about 15-30 minutes. You want them firm, but not frozen.
- Next, melt your light cocoa candy melts in a deep, microwave safe bowl
- Use a large spoon to dip your red velvet balls into the melted chocolate
- Place the balls back on cookie sheet with wax paper & allow them to dry
- Once the chocolate is dry, melt some white candy melts.
- Pour the melted white chocolate in a ziploc bag. Snip a TINY hole in the corner of the ziploc bag.
- Drizzle the white chocolate over the red velvet chocolate balls & allow the white chocolate to dry.
- We put ours in the fridge to chill for a while and they were DELICIOUS!!!
Um….they are so yummy. Let me go ahead and give you fair warning…..once you pop you can’t stop!!! They are seriously addicting.
If you end up making some, let me know how they turned out. Of course, you can always add the sticks before you dip them in the chocolate (just make sure you have some floral foam to stick them in so they can dry upright).
Enjoy!
Amy

I've had some cake balls & pops my friends have made and boy are they good!!!
ReplyDeleteMeggy from Chasing Davies
Great reaading this
ReplyDelete