Showing posts with label decorating. Show all posts

Tuesday, January 31, 2012

A Small Dining Room Update


Our dining room is still a work in progress.  We still need to add the faux wainscoting to the bottom part of the wall and paint it white.

But, I just can’t imagine starting another big project right now.  I mean, not that adding faux wainscoting is a huge ordeal, but it will be time consuming and involve more paint and paint brushes and after painting the whole playroom by myself…..I’m just not interested in that right now.  At least not for another week or two!  Hehehe!  Winking smile

Anyway, I did make a couple minor updates since you saw it last.

#1.  I added some décor to top of the buffet table and hung a mirror (and of course I hung it too high and have been too lazy to move it down some).

IMG_7492

Nothing crazy and the vignette is still a work in progress too, but it’s a start.  I need to find something to fill the tall vase on the left and I’d like to replace the lamp.  I also STILL need to slipcover those dadgum zebra chairs.  It’s on the list.

The update I’m most thrilled with is the addition of some simple wall art.

You’ll see in the very first picture that the wall to the left of the doorway was blank.  I had to big empty wall spaces to fill on either side of the window.

IMG_7343-1IMG_7344-1

I found these gorgeous distressed white iron scroll-y doom-a-jigs at Hobby Lobby!  And they were 40% off (which made it about $25 for both of them)!  I knew they would be perfect for the space!  And they are!  I think they were the perfect addition.

IMG_7345

Love, love, love them! 

Now if we can just ever get the rest of the room finished.  One day motivation will strike, I just know it! 

Thanks for listening to me ramble about the small things that make me giddy!


new signature copy


Tuesday, January 10, 2012

Getting Organized: Create An Organized Family Command Center


Hey guys!
Well, I’m back with yet another organizing post!  I’m on a roll with this whole organizing thing.  Let’s pray I can stay this motivated because I have several more areas of the house that need some serious organizing!
I wanted to share with you today a little “command center” of sorts that I created for my family.


mail station
We are fortunate enough to have a little office area in our breakfast nook.  It is so convenient.  It is literally right in the heart of the house.  It’s right next to the kitchen and family room where we literally spend all our time.  It’s a great little space!
But, because it is right at the center of everything – it is also the first place that gets the most cluttered and unorganized!  We would throw our mail here, random papers would find their way here, keys, hats, wallets, you name it.  And IT DROVE ME NUTS!  I couldn’t stand that this area had such great potential and we kept it so cluttered.  So I organized it!


I’m ashamed, but here are some before shots:


messy mail station
Junk, junk, junk!  Sour patch kids (my hubs has a thing for candy), business cards, scissors, notes, appointment cards, label maker, magazines, mail stuff….AAAAHHHHH!!!!! 


messy mail station 2

It all started because I had to empty out the bottom 2 drawers from our office nook because I have a curious little toddler who likes to open them and pull everything out.  I figured it probably wasn’t a good idea that she get ahold of the sharp letter opener, or the expensive custom address stamp thing-a-ma-bob (that’s just to name a few of the potentially harmful doo-dads in those drawers).
Do you see those mail holders we had?  Super cute, right?  I mean….they’re “His” and “Hers” (cue the “aawwwwwws”).  But they were WIDE OPEN and as you can see….someone – not mentioning any names (*ahem* SCOTT *ahem*) – wasn’t that great at keeping their little mailbox nice and tidy.  In his defense, I just just cleaned mine out the day before so mine didn’t always look this tidy either. 
I knew I had to do something.  I needed a functional space where I could keep a calendar, house our mail (and all our mailing accessories – stamps, letter opener, address stamp, etc), keep a notepad, and have a cute little pen holder.


And here’s what I came up with……


command center
SO MUCH BETTER, right?  Love!


I found some nice, sturdy gray magazine files at Target.  I thought these would be great for our mail because they are nice and tall and would hide even those big, bulky envelopes that Scott sometimes gets in the mail.  And we get a lot of magazines, so magazine files made sense! 
I framed a calendar that I printed out from Seaside Creative.  I also DIYed that little wooden tray with some spray paint and vinyl (more on that later) and the box that holds our mailing supplies.  

 
IMG_7242
IMG_7279
Hhmmm….I decided after looking at these pictures that I’m not a big fan of the green contact paper anymore.  I need to take that down, stat!  I also need to come up with something to hang from the random black bar on the wall (it’s from IKEA and used to hold little tin buckets but I wasn’t feeling the tin buckets anymore so I took them down and haven’t replaced them).
So what do you think?  What spaces have you been organizing?  Do you just love the fresh start that a new year brings as much as I do?
Thanks for stopping by!

new signature copy

I am linking up to many of these great parties:

M: DIY Showoff Project Parade, Metamorphosis Monday, Made by You Mondays, Just Something I Whipped Up, Today’s Creative Blog, Making Monday Marvelous, Polly Want A Crafter T: Get Your Craft On, Tip Junkie, Home Stories A to Z, Homework W: Passionately Artistic, Twin Dragonfly Designs, Creative Spark @ Clean & Scentsible, Not Just A Housewife Th: 36th Avenue, Just A Girl, Gluesticks, House of Hepworths, Every Creative Endeavor F: Sassy Sites, I’m Lovin’ It, Remodelaholic’s Anonymous, Frugal Friday, Friday Fun Finds, Feature Yourself Friday, Pity Party, Weekend Wrap-Up, Weekend Bloggy Reading S:  I Heart Naptime, Be Different, Act Normal, A Little Lovely,  Su:  Under The Table & Dreaming, Remodelaholic, Homemaker On A Dime


Pin It


Wednesday, December 28, 2011

My Top Ten Favorite Projects of 2011


Hey, hey!
Yesterday I shared with you the top 10 projects of 2011 based on YOU GUYS and your page views!  I have to say I was shocked at some of them.  I never would have thought that the DIY Mercury Glass would have been the most viewed project!  I guess a lot of people Google that phrase! 
Well, today I am back to share with you some of MY personal favorite projects from this year. 
Here goes…..

#10  Painted Beadboard Bookcase


#9  Half Bath Makeover


#8  Envelope Pillow Cover


#7  Fall Pumpkin Topiary


#6  Burlap & Felt Christmas Pillow


#5  Sleeping Baby Sign


#4  Family Room Makeover


#3  DIY Tabbed Back Chevron Curtains


#2  Stenciled Dining Room Wall & Painted Striped Curtains


And my absolute most favorite project to date……….

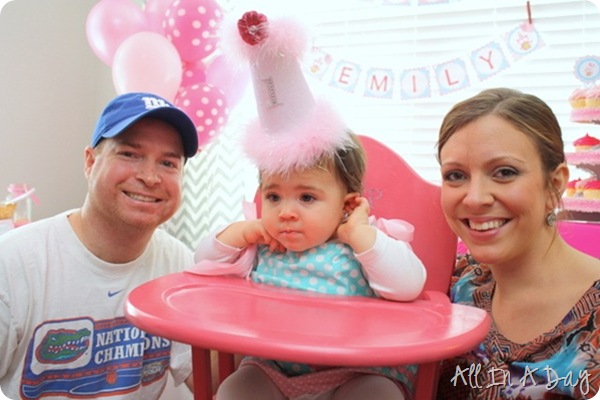
#1  Emily’s First Birthday Party!!!!!!!!!!!!!!


I hope you enjoyed all of these projects as well!  They have certainly helped to transform my home into a place that I am proud of! 
Thanks for stopping by!

sig PNG copy


Friday, December 9, 2011

Our Christmas Tree & Mantle


Hi, Friends!
Happy Friday!!! 
I have to say, I am super, super, super happy and excited today.  My husband has been in Las Vegas for an entire week!  He flew out last Friday and is coming home today!  He had a training for work out there, but went out a few days early for some fun boy time with one of his friends that came over from L.A.  I have to say….I have missed him terribly.  Sometimes I forget how much I need him.  He’s the peanut butter to my jelly.  The bacon to my eggs.  The ying to my yang.  The elastic to my granny panties.  He’s Donnie, I’m Marie.  He’s Ross, I’m Rachel.  You get the point.  I miss him.
Anywho….I didn’t mean to get all mushy gushy on you!
I have been slowly bringing out our Christmas decorations.  I’ve kind of had to start from scratch on a super tight budget since I went with a neutral theme this year.  I wanted to use lots of silver & gold and natural textures, with lots of white and ivory.  Remember my Christmas décor inspiration post?  I also wanted to incorporate some pops of red, which is what I did with my Christmas pillow covers in the family room!
So….here is our tree this year.  We bought a smaller tree and put it up on a table.  It’s definitely not my favorite but we had to.  Emily just started walking and she just loves to explore.  I could see the tree just being a disaster if we would have put it on the floor.
IMG_6883
I made the burlap & tulle garlands.  I took inspiration from the amazing ladies over at Do It Yourself Divas.
IMG_6884IMG_6931
IMG_6942

Our mantle this year is very simple.  It’s not very deep so I’m limited to what I can put on it with the garland.  But I just love the look of garland on a mantle. 
IMG_6918
The vase on the left is filled with a $3 sprig of pinecones and berries from Target.  The silver owl was a $5 find at Ross several months ago.  I got it for Emily’s birthday party, but he has become a staple on the mantle.  I made the wreath that is hanging from the mirror.  It is made of tulle and is accented with a pretty poinsettia flower and some gorgeous cream and gold glittery ribbon.  The gold reindeer on the right was a $1 spot Target find.  Although it was $2.50, not $1.  Still not too shabby!
IMG_6921IMG_6920
IMG_6922
IMG_6927
IMG_6946
And of course, we put up Emily’s little tree!
IMG_6950
IMG_6951
IMG_6952
IMG_6948

So that’s it!  What do you think?  I’m really liking the whole “neutral” thing and I think I might stick with it again next year too.  Maybe next year I’ll get around to making the burlap & linen tree skirt I wanted to make this year.  What does your décor look like this Holiday season?  I’d LOVE to see!  Please share!
Thanks for stopping by!
sig PNG copy
[IMG]http://i1128.photobucket.com/albums/m494/amynwaller/sig.jpg[/IMG]

Thursday, December 8, 2011

Simple Christmas Pillow Covers


By now you have probably realized that I have a thing for pillows.  And my new found love for these easy envelope pillow covers (the tutorial that I follow can be found here) just took my crush to the next level!!  Pillows are such an easy way to update your décor.  They are a great way to add just the right amount of a pop of color to any room!
IMG_6876_txt
Like I mentioned, I usually follow the super easy tutorial from Texas Cottage.  But, the other day I was in Hobby Lobby and found some really pretty kitchen towels for $2.50!  It was a gorgeous canvas that had Merry Christmas written all over it in different fonts in red.  The 2nd kitchen towel was plain red.  I snagged up 2 of these for a total of $5!  I knew these would be perfect pillows and still neutral enough to go with my neutral Christmas décor this year. 
I really wanted to make these envelope pillow style so I could easily slip my existing pillows in them (like I did in this post).  Pillow covers are also so easy to store!  Once a season is over, you just take them off and fold them up and store away for next year.
The problem with the kitchen towels is that I couldn’t really use the tutorial that I usually follow to make these covers.  Then I saw Shelley from The House of Smiths post about their Christmas décor.  She used napkins and towels to make envelope style pillows for her home too!  She told me that she just cut the back piece of fabric into 2 pieces and overlapped them to create the “envelope”.   DUH!  So easy!  So that is exactly what I did!
IMG_6879
The red & green plaid pillows are napkins from Target and I used the same method with those.  The only difference is I used pieces of canvas drop cloth for the back!  I am LOVING canvas drop cloth right now!IMG_6882

IMG_6878
I’m loving how they turned out and I love the pop of red!
I am slowly but surely finishing up the rest of our Christmas decorations.  I’ve had a lot of orders from my Etsy shop to work on lately so I’ve been super busy with that.
Thanks for stopping by!
sig PNG copy


Tuesday, November 15, 2011

Christmas Décor Galore

I am getting so excited about Christmas!!  I can’t wait to wrap everyone’s gifts in pretty packaging, create handmade gifts for neighbors and friends, spend time with family, and see my little girl’s eyes light up on Christmas morning!

I have been thinking a lot about what direction I want to go in for Christmas décor this year.  I am so torn because there are so many cute color combinations!  But, I think I have decided on a “neutral” Christmas using ivories, golds, silvers, and of course…..burlap!

So, to prepare for my “neutral” Christmas décor this year, I have turned to none other than my bestie, Pinterest!  Here are some of my favorite finds………

I love this neutral tree!  I will definitely have a burlap garland on my tree though!

Source:  BHG via Elisha/Pinterest


I love, love, love this tree!  This is exactly what I’m going for!

Source: DIY Divas via Ucreate via Hannah/Pinterest

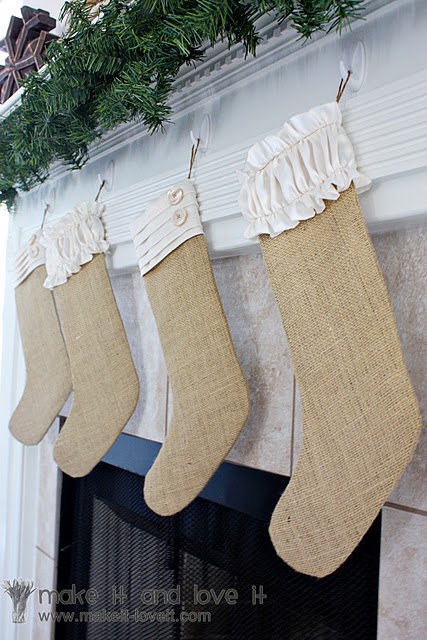
Even though we ordered personalized stockings from PB last year, I am thinking about making some stockings like this!  I just love them!

Source:  Make It & Love It via The Crafting Chicks via Erin/Pinterest

This pillow is just to die for!  So cute, but can easily be made with some drop cloth and a Goodwill sweater!

Source:  PotteryBarn via Karen/Pinterest

I just love this simple décor!  Seems so easy!  I would love this on my mantle or buffet table!

Source: Shanty2Chic via Andrea/Pinterest

I also love this simple burlap tree!  This would also look great on the mantle or in a grouping as a centerpiece!

Source: Shanty2Chic via UCreate via Jennifer/Pinterest


This post has officially made me realize that I need to go buy more burlap and get busy!!  ‘Tis the season!  The best season ever!

So what are your décor plans for Christmas this year?  I’d love to hear your ideas! 


sig PNG copy

[IMG]http://i1128.photobucket.com/albums/m494/amynwaller/sig.jpg[/IMG]

Add This